LSM UPGRADES – FLIM STUDIO & Abberior STEDYCON
The FLIM Data Acquisition Card and our software FLIM STUDIO enhances the Abberior STEDYCON system by significantly expanding its capabilities.
This add on allows for a deeper investigation into the nuances of fluorescence lifetime, paving the way for advanced exploration in fluorescence imaging. It equips researchers with the tools to discover insights with unparalleled clarity and precision.

Abberior STEDYCON
Abberior STEDYCON is an advanced microscopy system that transforms standard microscopes into super-resolution imaging tools. STED stands for Stimulated Emission Depletion, which is a fluorescence microscopy technique that surpasses the traditional diffraction limit to achieve images with much higher resolution, typically on the order of nanometers.
Hardware Connections
STEDYCON arrives ready-to-use and it is comprised of three key components:
- Power Supply Unit (Hardware)
- Laser Control Module (Hardware)
- Stedycon software (Image acquisition software)
Building on this foundation, the Flim Data Acquisition Card and our software FLIM STUDIO are designed for seamless integration with the system, enhancing the capabilities of STEDYCON with advanced fluorescence imaging techniques. The integration process is designed to be straightforward, promoting an efficient setup that allows researchers to focus on their experiments with minimal downtime.
Here’s a concise guide to get you started:
- Install Abberior STEDYCON software and our software FLIM STUDIO on your computer.
- Connect the Abberior hardware device to your microscope.
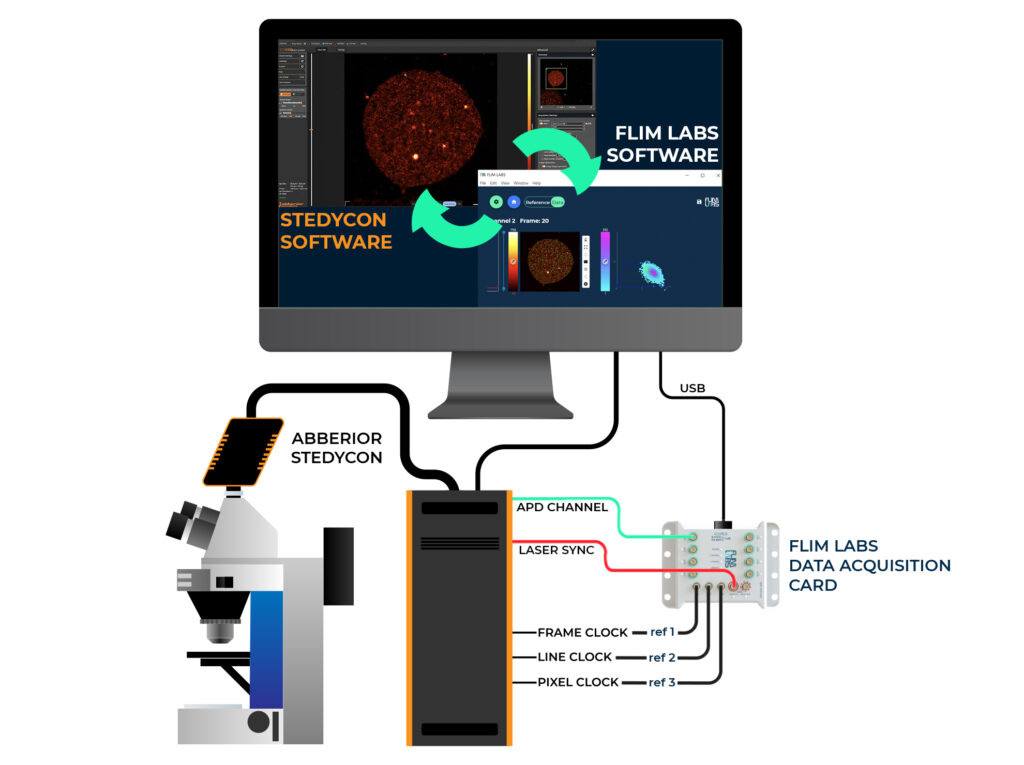
- Establish a connection between the FLIM Data Acquisition Card and the Abberior hardware. There are five simple connections to make:
- Connect Abberior’s APD output to the FLIM Data Acquisition Card for seamless fluorescence data transfer.

- Establish a link between Abberior’s laser synchronization port (LASER SYNC) and the FLIM Data Acquisition Card corresponding port for sampling laser repetition rate (sync-in).
- Connect one or more ports of the Abberior scanning system (Frame Clock, Line Clock, Pixel Clock) to their respective counterparts on the FLIM Data Acquisition Card (ref1, ref2, ref3) depending on your needs.
PIXEL, LINE and FRAME
Pixel Clock, Line Clock, and Frame Clock constitute the trio of essential data harnessed by FLIM STUDIO for image reconstruction.
- Pixel Clock: Dictate the exposure time of each pixel (dwell time) (refer to port ref1).
- Line Clock: Govern the readout speed of each pixel row (refer to port ref2).
- Frame Clock: Regulate the acquisition rate of the entire image (frame rate) (refer to port ref3).
While these data points are crucial for image reconstruction, FLIM STUDIO excels in producing high-quality reconstructions even in their absence. Remarkably, the software is adept at making measurements without compromising accuracy, utilizing only the Frame Clock or both Frame Clock and Line Clock.
This intrinsic capability enhances the software’s versatility, making it effortlessly adaptable and user-friendly.
A special note of thanks to Francesco Reina, Jacopo Abramo and Giovanni De Angelis for their exceptional support. Their expertise and dedication have been pivotal. We are immensely grateful for their contributions, which reflect our commitment to excellence
Software Setup
Once you’ve seamlessly connected the Abberior STEDYCON and FLIM Data Acquisition Card, configuring the softwares becomes a straightforward process, providing you with flexibility and precision for your experiments.
Let’s delve into FLIM STUDIO’s user-friendly software configuration. Whether you prefer the advanced mode for meticulous control or the wizard for a guided experience, FLIM STUDIO caters to your preferences.
In wizard mode, as well as in the advanced setting, the system automatically detects the acquisition card connection, streamlining the setup process. Select the experiment type (imaging or spectroscopy) and effortlessly configure synchronization. Clicking on the sync-in channel initiates the automatic detection of Abberior devices, seamlessly capturing laser period and frequency.
Adjust acquisition card channels based on your hardware connection and set up references like Pixel, Line, and Frame accordingly. Configure image acquisition settings such as box size, offsets, and pixel count to tailor the experiment to your specifications.
Moving on to the Abberior software, after completing FLIM STUDIO configuration, fine-tune your settings for precise image acquisition:
- Set Pixel Parameters: Define the number of pixels for customized resolution.
Ensure that a square section image is set in the advanced settings of the STEDYCON software, and the same values increased by 1 pixel are used for box width and box height fields in FLIM STUDIO. - Region of Interest (ROI): Optionally focus on a specific part of the image for flexible analysis.
- Initiate Reference Acquisition: Start acquiring the reference while setting the desired number of frames in FLIM STUDIO for seamless coordination.
- Use the Scouting mode to explore and test the sample, ensuring that FLIM STUDIO software is aligned with the STEDYCON software.
- Calibrate the FLIM STUDIO software using the Reference mode on a sample with a known mono-exponential fluorescence lifetime.
- After calibrating the software, use the Data mode to initiate the experiment and acquire real FLIM data and images, allowing you to analyze the results with FLIM PHASORS
TIPS:To ensure a seamless integration start the image acquisition with FlLIM STUDIO first, then initiate the acquisition process with the STEDYCON software. Please also note that FLIM STUDIO automatically discards the first received frame.
With FLIM STUDIO and Abberior software working in harmony, you have a powerful and intuitive system that empowers your research with cutting-edge capabilities. From hardware to software, the entire process is designed for simplicity without compromising precision.
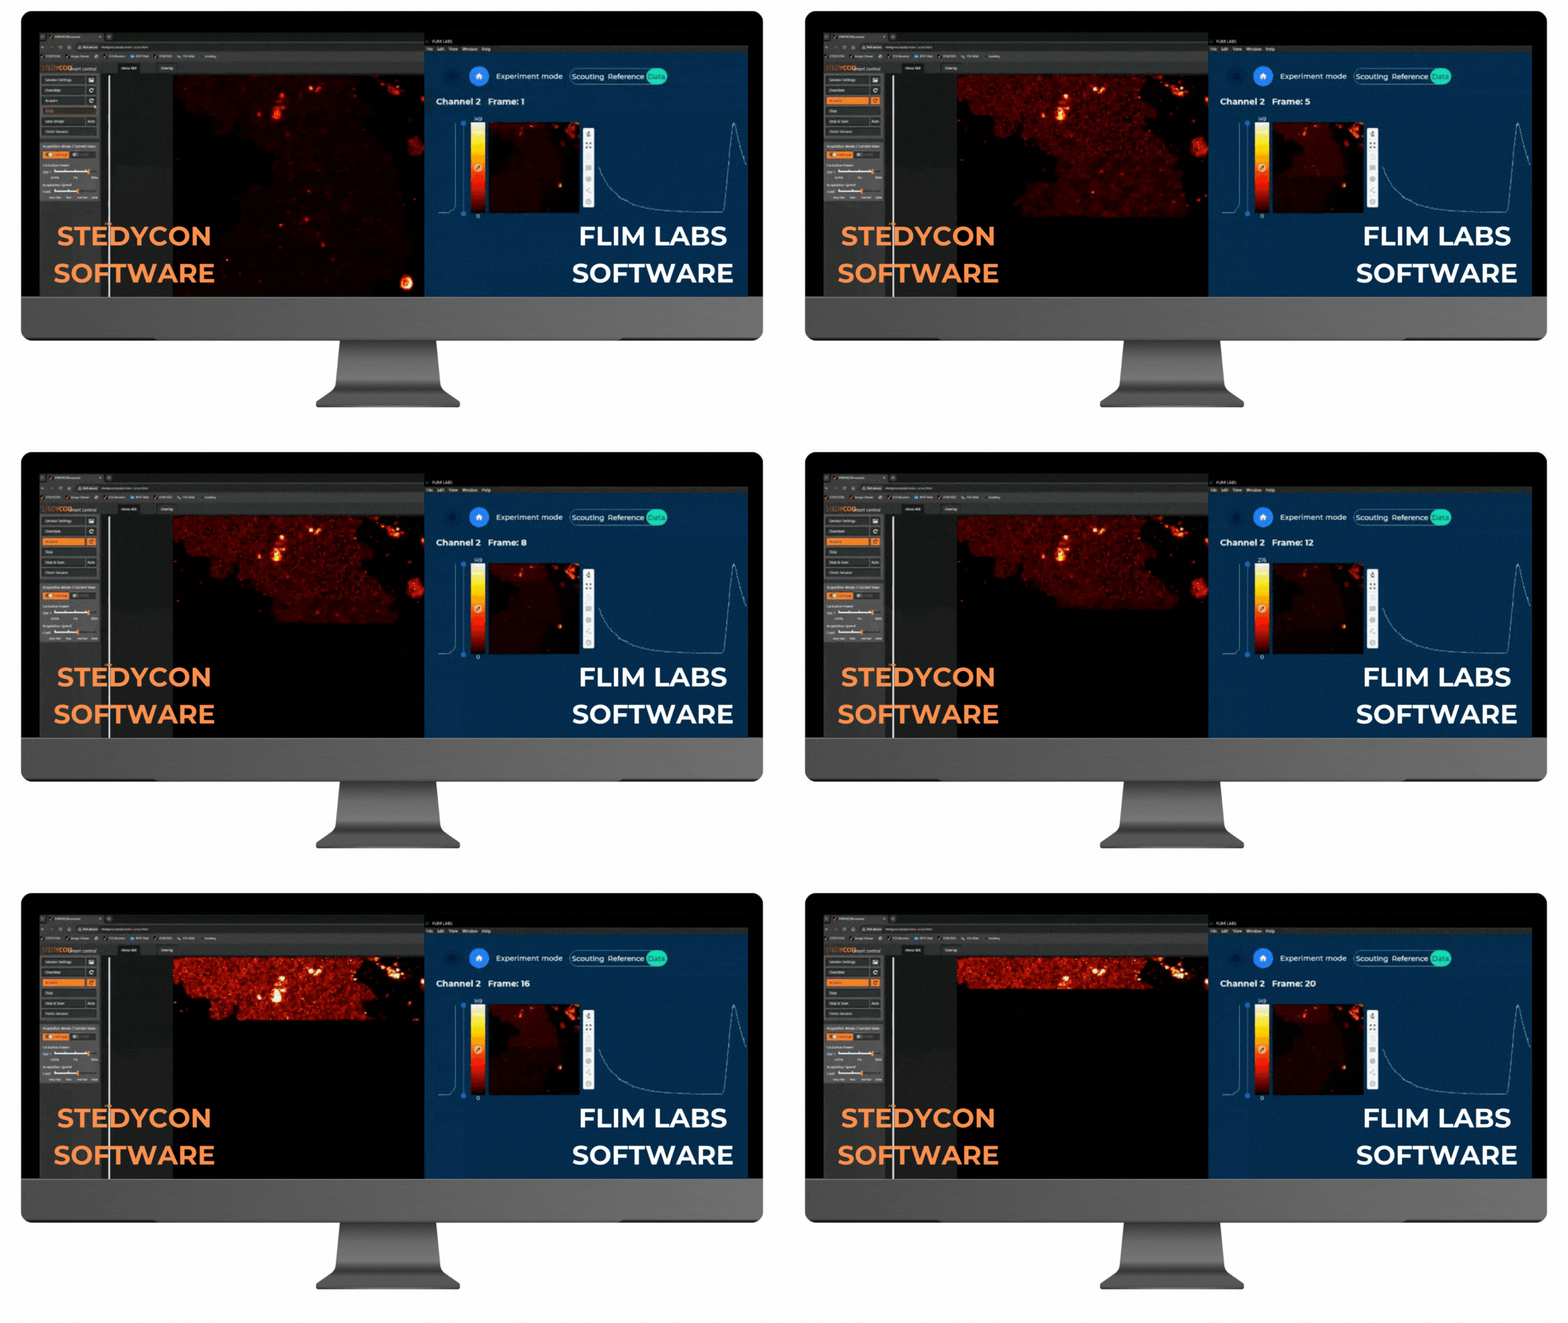
We tested our FLIM Acquisition Card with the Abberior Stedycom and the new FLIM Imager software


